Being
a DBA, it is good to be independent of system admin as much as you can because
many times you could be in a situation where you need to install and/or manage
the OS yourself and also need to suggest some OS tuning or parameter setting to
run Oracle successfully on your system. Here I will be explaining how to
install Oracle Linux 6 on a server
. Click here for the installation guide of Oracle Linux 7.
For my server, the specifications are as follows.
2 CPU
2 G RAM
128 G Hard Disk
. Click here for the installation guide of Oracle Linux 7.
For my server, the specifications are as follows.
2 CPU
2 G RAM
128 G Hard Disk
You may download Oracle Linux from
http://edelivery.oracle.com by using a valid MOS username and password. Once
you have downloaded the media, prepare a DVD and use that DVD for the
installation, or if it is possible for you to access the downloaded ISO image
over the network.
1)
Once your fresh system boots with the DVD, you see following screen. First option “Install Oracle Linux 6.0” is by default selected, press enter to proceed, or you may want to test your media first before proceeding further.

2)
You may test the media before beginning the installation, or you can just skip it

3)
Click Next

4)
Select language and click Next

5)
Click Next

6)
Select “Basic Storage Devices” and click Next

7)
Click “Yes, discard any data”

8)
Enter the host name and click Next

Select timezone, click Next

10)
Provide root password, click Next

11)
Select “Create Custom Layout”. This will allow us to partition the disk and create mount points. Click Next

12)
Now we will partition the disk and create mount points. Select “Free” and then click Create button.

13)
Select “Standard Partition”. Click Create

14)
From the drop down, select a file system type and specify the size of the file system you want to allocate to this file system. Installer will create a new partition and mount that partition to the mount point you select from the drop down.
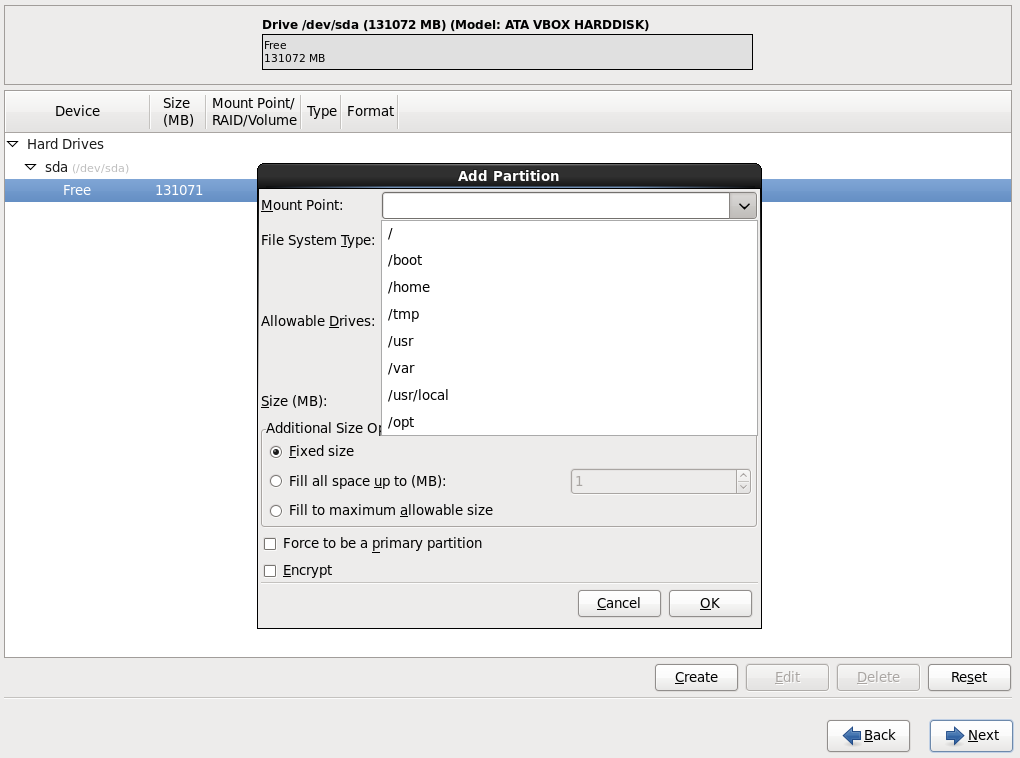
15)
Repeat above step again and again to create as many file systems as you want. I usually create only 3 which include /boot, /, and SWAP. Following is the details of the file systems I created. For Oracle installations, check version specific installation guide about how much SWAP space should be allocated. SWAP space can be increase after the installation.

16)
Click Format

17)
Click Next

18)
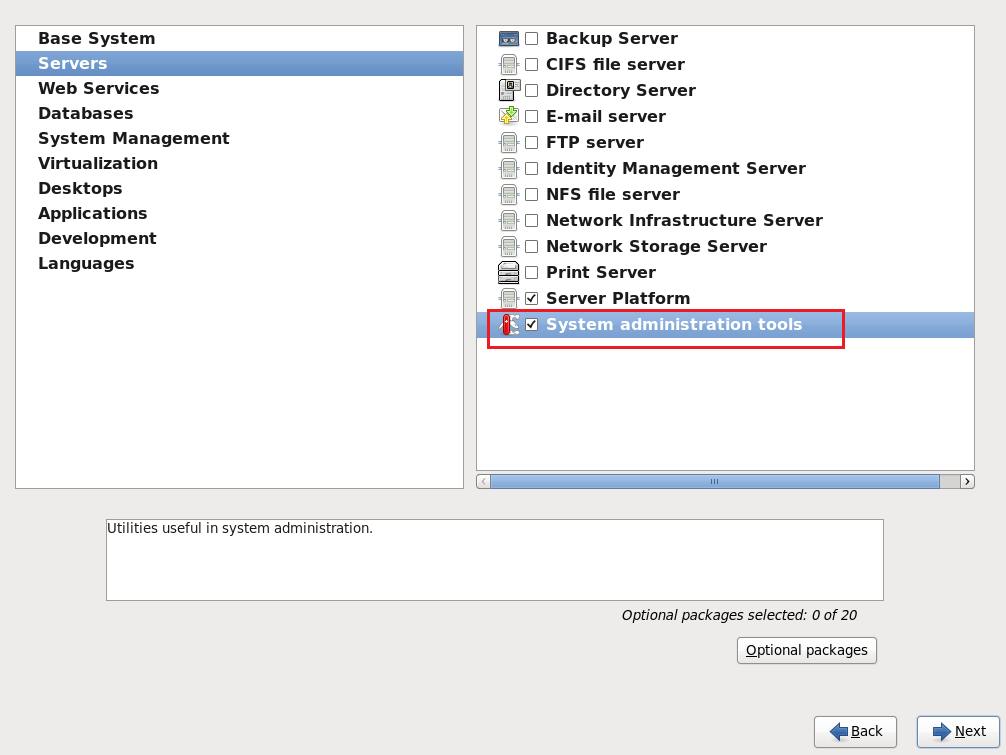
From this screen, select what type of installation you want to do. I selected Desktop and then selected “Customize now” to select any more options during the installation. Click Next

19)
Following screens sequence show what I a selected during customized selection of components. For DBAs, the components I have selected are enough for running Oracle on it and for system administration.


20)
Once software selection completes, click Next to begin the installation

21)
Once installation completes, click Reboot button.


23)
Server is ready, log in and use.


No comments:
Post a Comment